Success in battle depends on more than seeing what’s in front of you. It also involves keeping track of your tank’s status, your team’s status, and the status of the opposing team.
The game HUD (Heads Up Display) is an essential part of gameplay that helps with that. It includes all the visual information on your screen during battle. Elements like the mini-map and your tank’s status box are all part of the HUD.
The following components are key parts of the HUD:
Game Mode BarAiming ReticleTarget InfoPlayer InfoColor-Coded Damage Values and Callouts |
HP Bars and Bounce IndicatorAmmo IndicatorConsumables ComponentMapRibbons |
Game Mode Bar
The Game Mode Bar at the top of the screen shows essential information about the match being played:
- The team composition, which is the number of tanks of each class that each team has
- The number of surviving tanks as well as the number of destroyed tanks on each team, represented by changes to the tank icons
- The time remaining in the match
- The progress of your team’s attempt to capture the enemy base

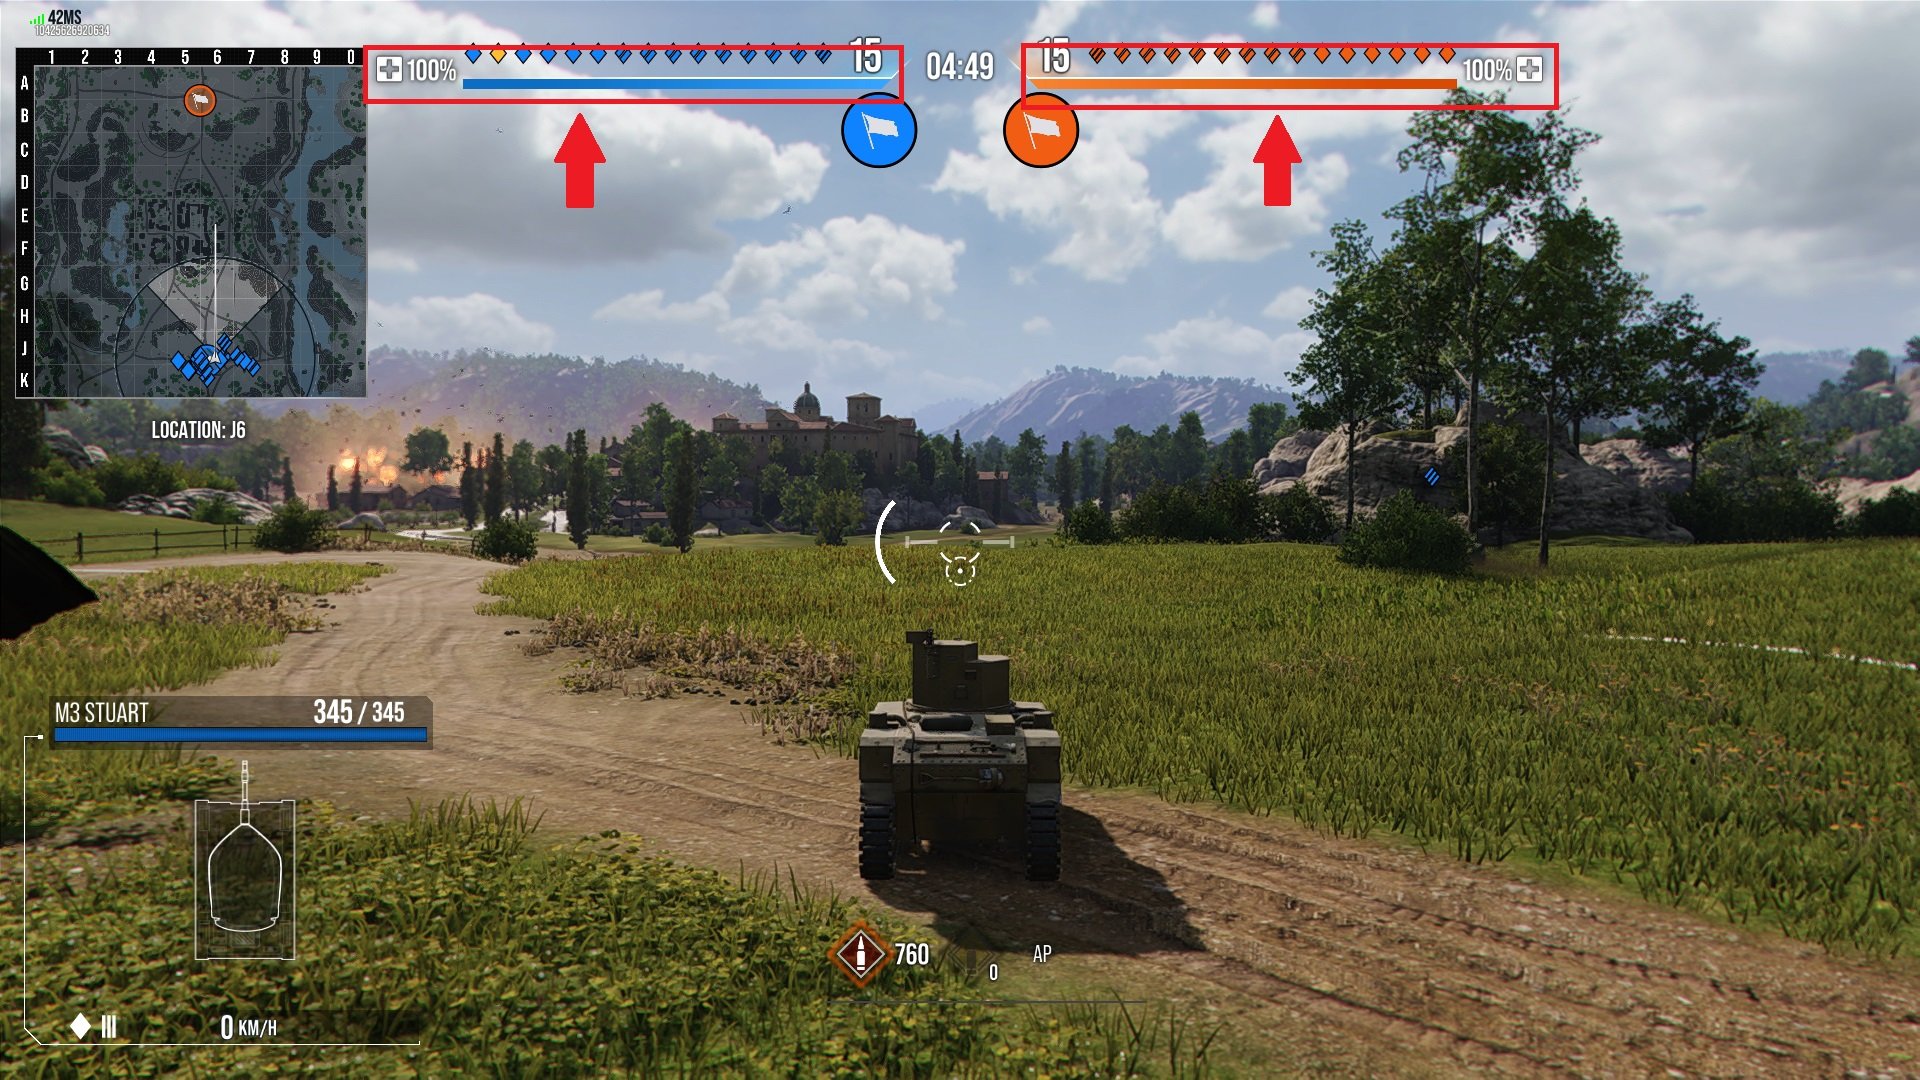
Team Health Bar
Added in April 2025, the Team Health Bar shows the percentage remaining of the entire team's overall health, starting at 100% and decreasing to 0%. This is a component of the Game Mode Bar and an opt-out feature for players, with several settings available in the "Options" tab:
- Full: Displays both the Health Bar and the % remaining.
- Bar Only: Displays only the Health Bar.
- % Only: Displays only the % remaining.
- None: Does not display the Health Bar or % remaining.
In addition to helping your team choose how to approach the battle, the Team Health Bar can also help you determine if your team will win in the case of a tie when the match time runs out. With this information, you can decide if you need to conserve your hit points or take out more of the enemy's health when it's coming down to the end of the match.
If the time runs out:
- Condition 1: The team with the most kills wins. If tied:
- Condition 2: The team with the greater health % remaining wins. If tied:
- Condition 3: The team who caused the most damage to destroyed enemies wins.
Aiming Reticle
Located in the center of the screen, the Aiming Reticle shows you exactly where you’re aiming your gun.
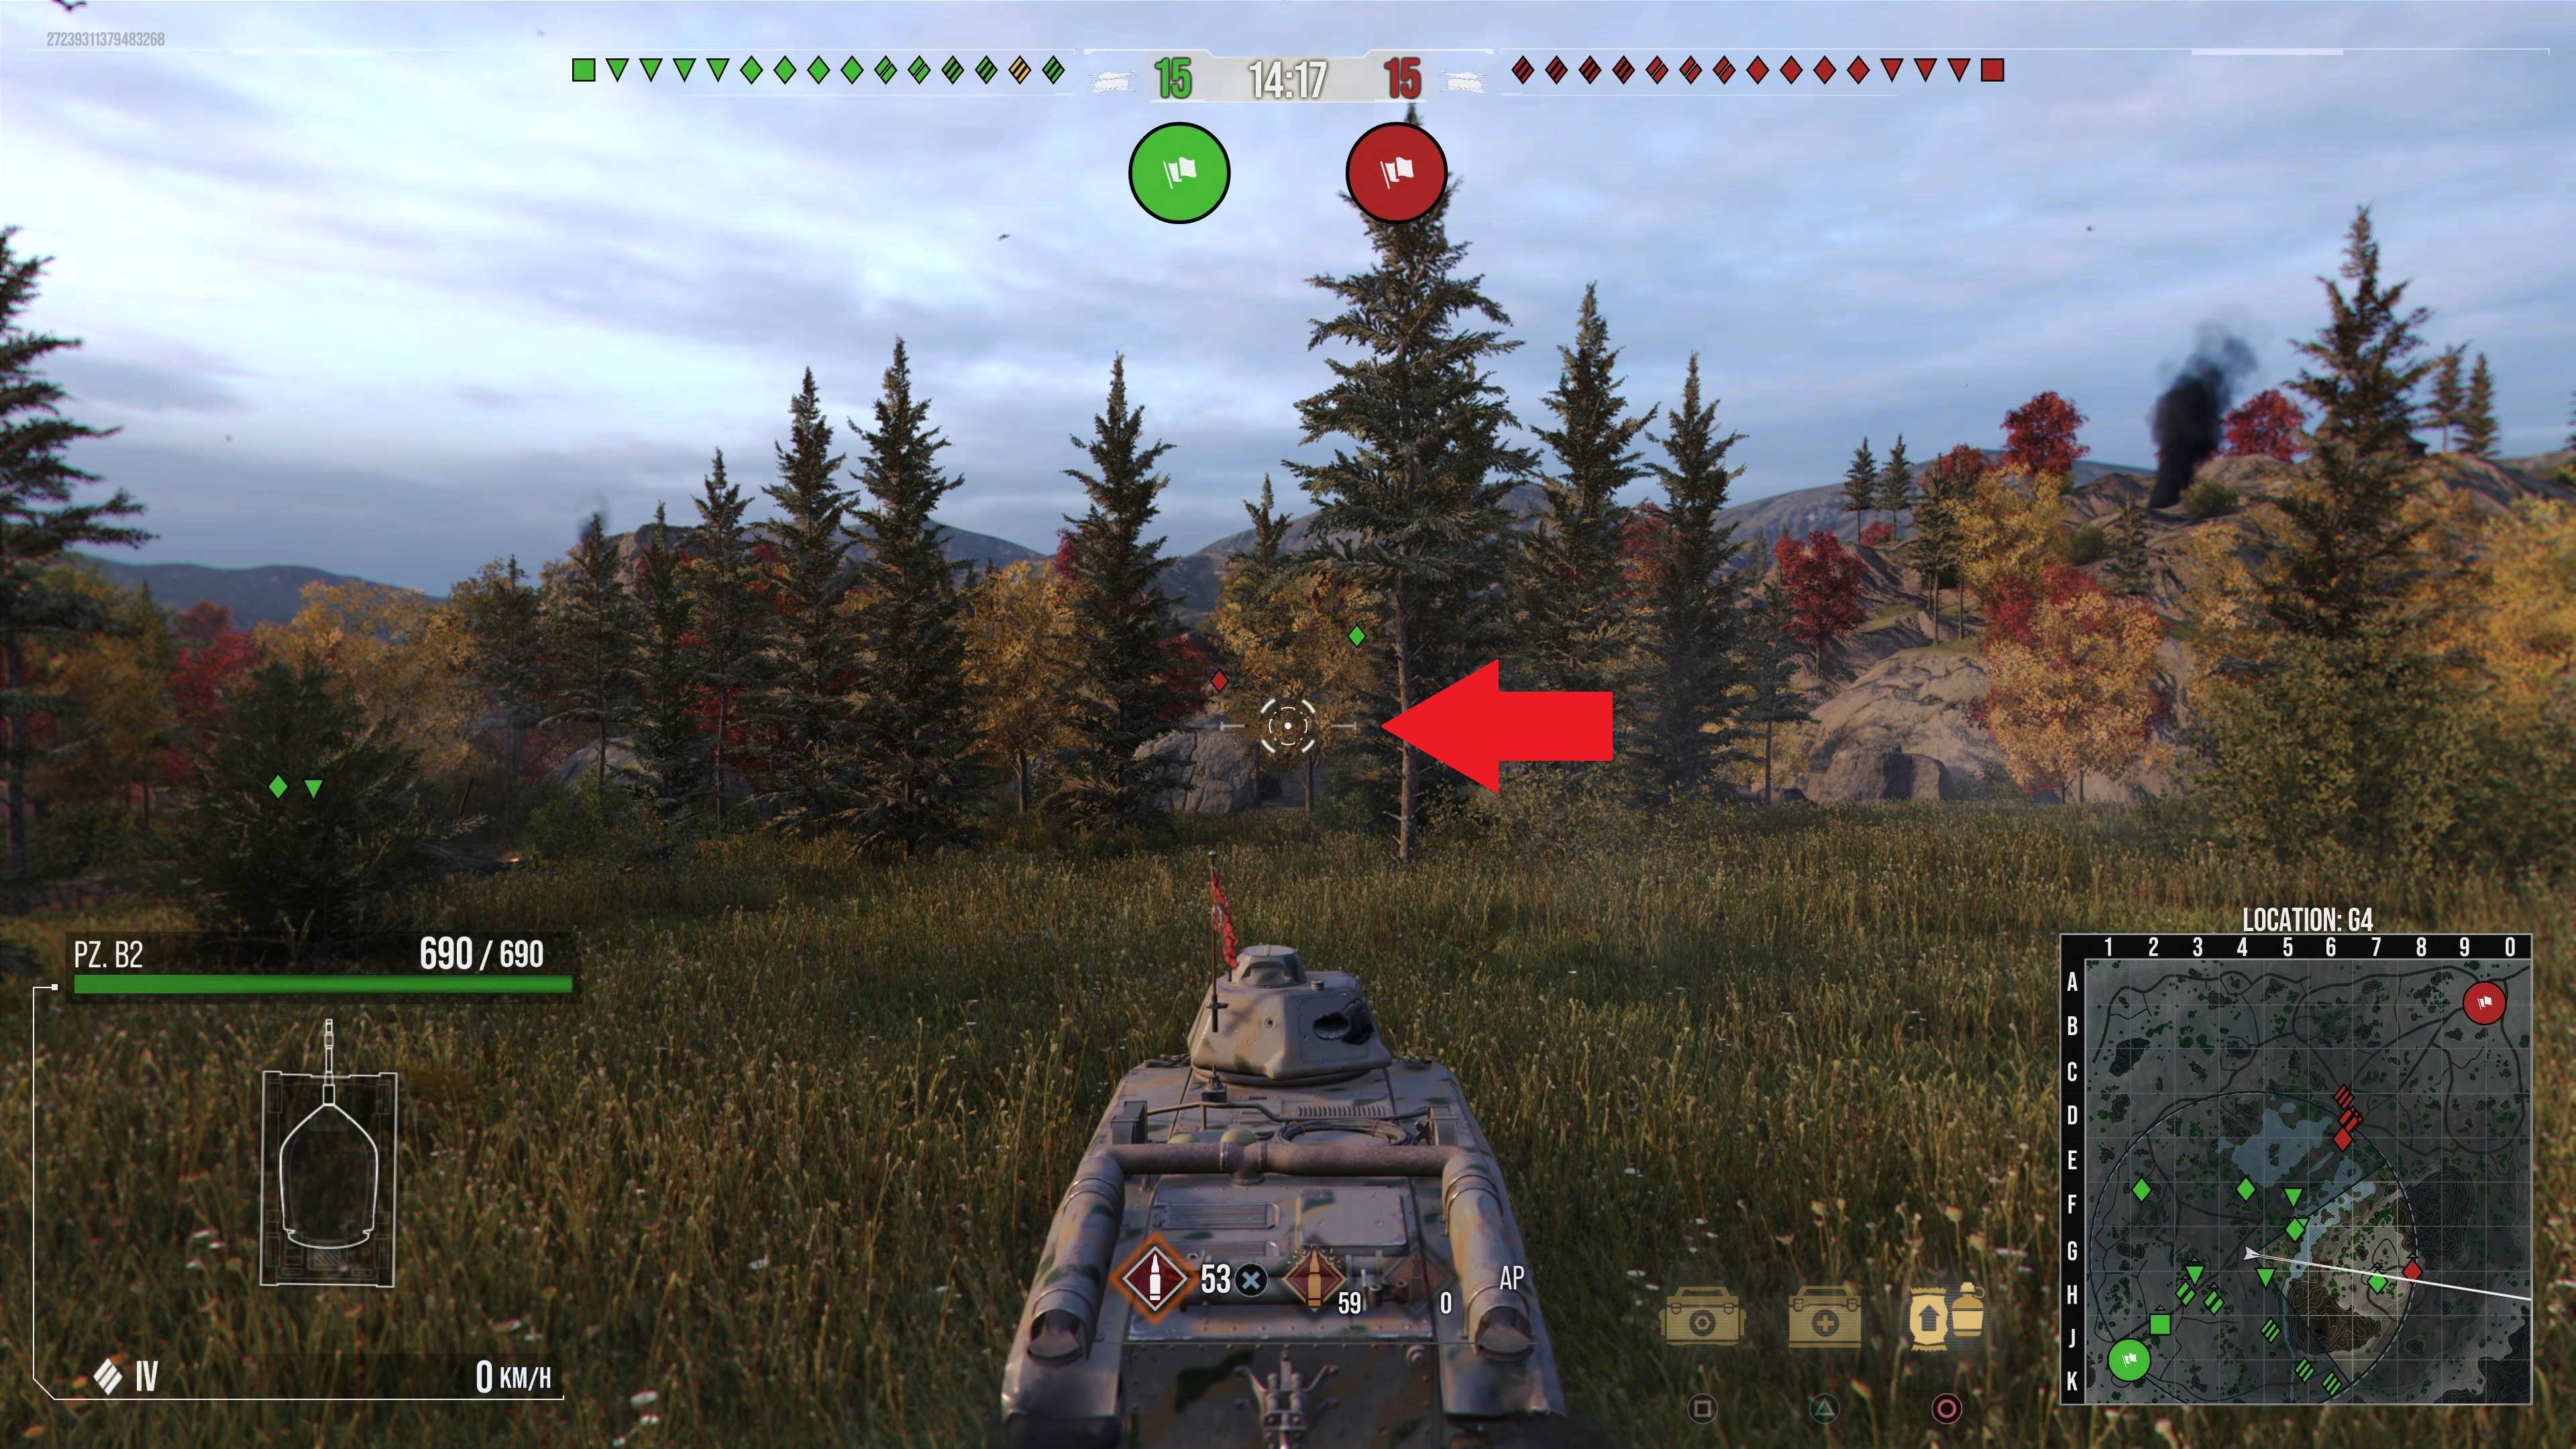
It also displays other important information:
- Reload Indicator
When you’re reloading your ammo, a circular fill animation will replace the reticle and show you how much time is left until your gun is ready to fire. The exact time will also appear below the circle. - Clip Status
If your tank has a clip-style weapon, you’ll see a display to the left of your reticle that represents each round in the clip. That will indicate how many rounds are currently loaded in your clip. - Penetration Indicator
When aiming at a tank, the color of the reticle will change depending on your chance to penetrate at the current aim point: Yellow = 0%, Orange = 50%, Red = 100% Do note that it does not account for spaced armor and only represents the penetration chance at the spot where the center aim dot is pointed. - Dispersion Circle
The larger circle is your dispersion circle. This circle will grow and shrink during battle to reflect the current accuracy of your gun. It’s important to remember that your round can go anywhere inside of this circle when you shoot, so it’s better to wait for it to fully shrink before shooting for the best accuracy. With the dispersion mechanics, most rounds will stay closer to the middle of the reticle with only a few rounds going to the edge of your dispersion circle. - Minimum Arming Distance
If you’re playing a Cold War vehicle equipped with missile ammunition (ATGMs), your reticle will show you your missiles’ minimum arming distance. This is the distance that an ATGM needs to travel until it is “armed” and can do its full damage and penetration. When you’re too close, your reticle will have an “X” over it with text stating that you’re too close. (You can still fire your missile, but its damage potential and penetration will be reduced.) When you’re farther than the minimum arming distance, your reticle will appear normal. - Multi-Turret HUD and Weapon Mechanics
- Each weapon has a reload bar displayed on the HUD. This allows you to easily view each weapon's status without needing to look at the bottom of the screen.
- Your primary turret's main weapon will always be displayed on the left side, with any other turrets' weapons represented on the right side.
- The size of the reload bar will reflect the weapon's size. If the weapon on the other turrets is of a smaller caliber, it will have a smaller reload display.
- A yellow chevron will point to the reload bar of the currently selected turret/weapon.
- The inactive weapons X crosshair will be greyed out.
- Each weapon has a reload bar displayed on the HUD. This allows you to easily view each weapon's status without needing to look at the bottom of the screen.
Target Info
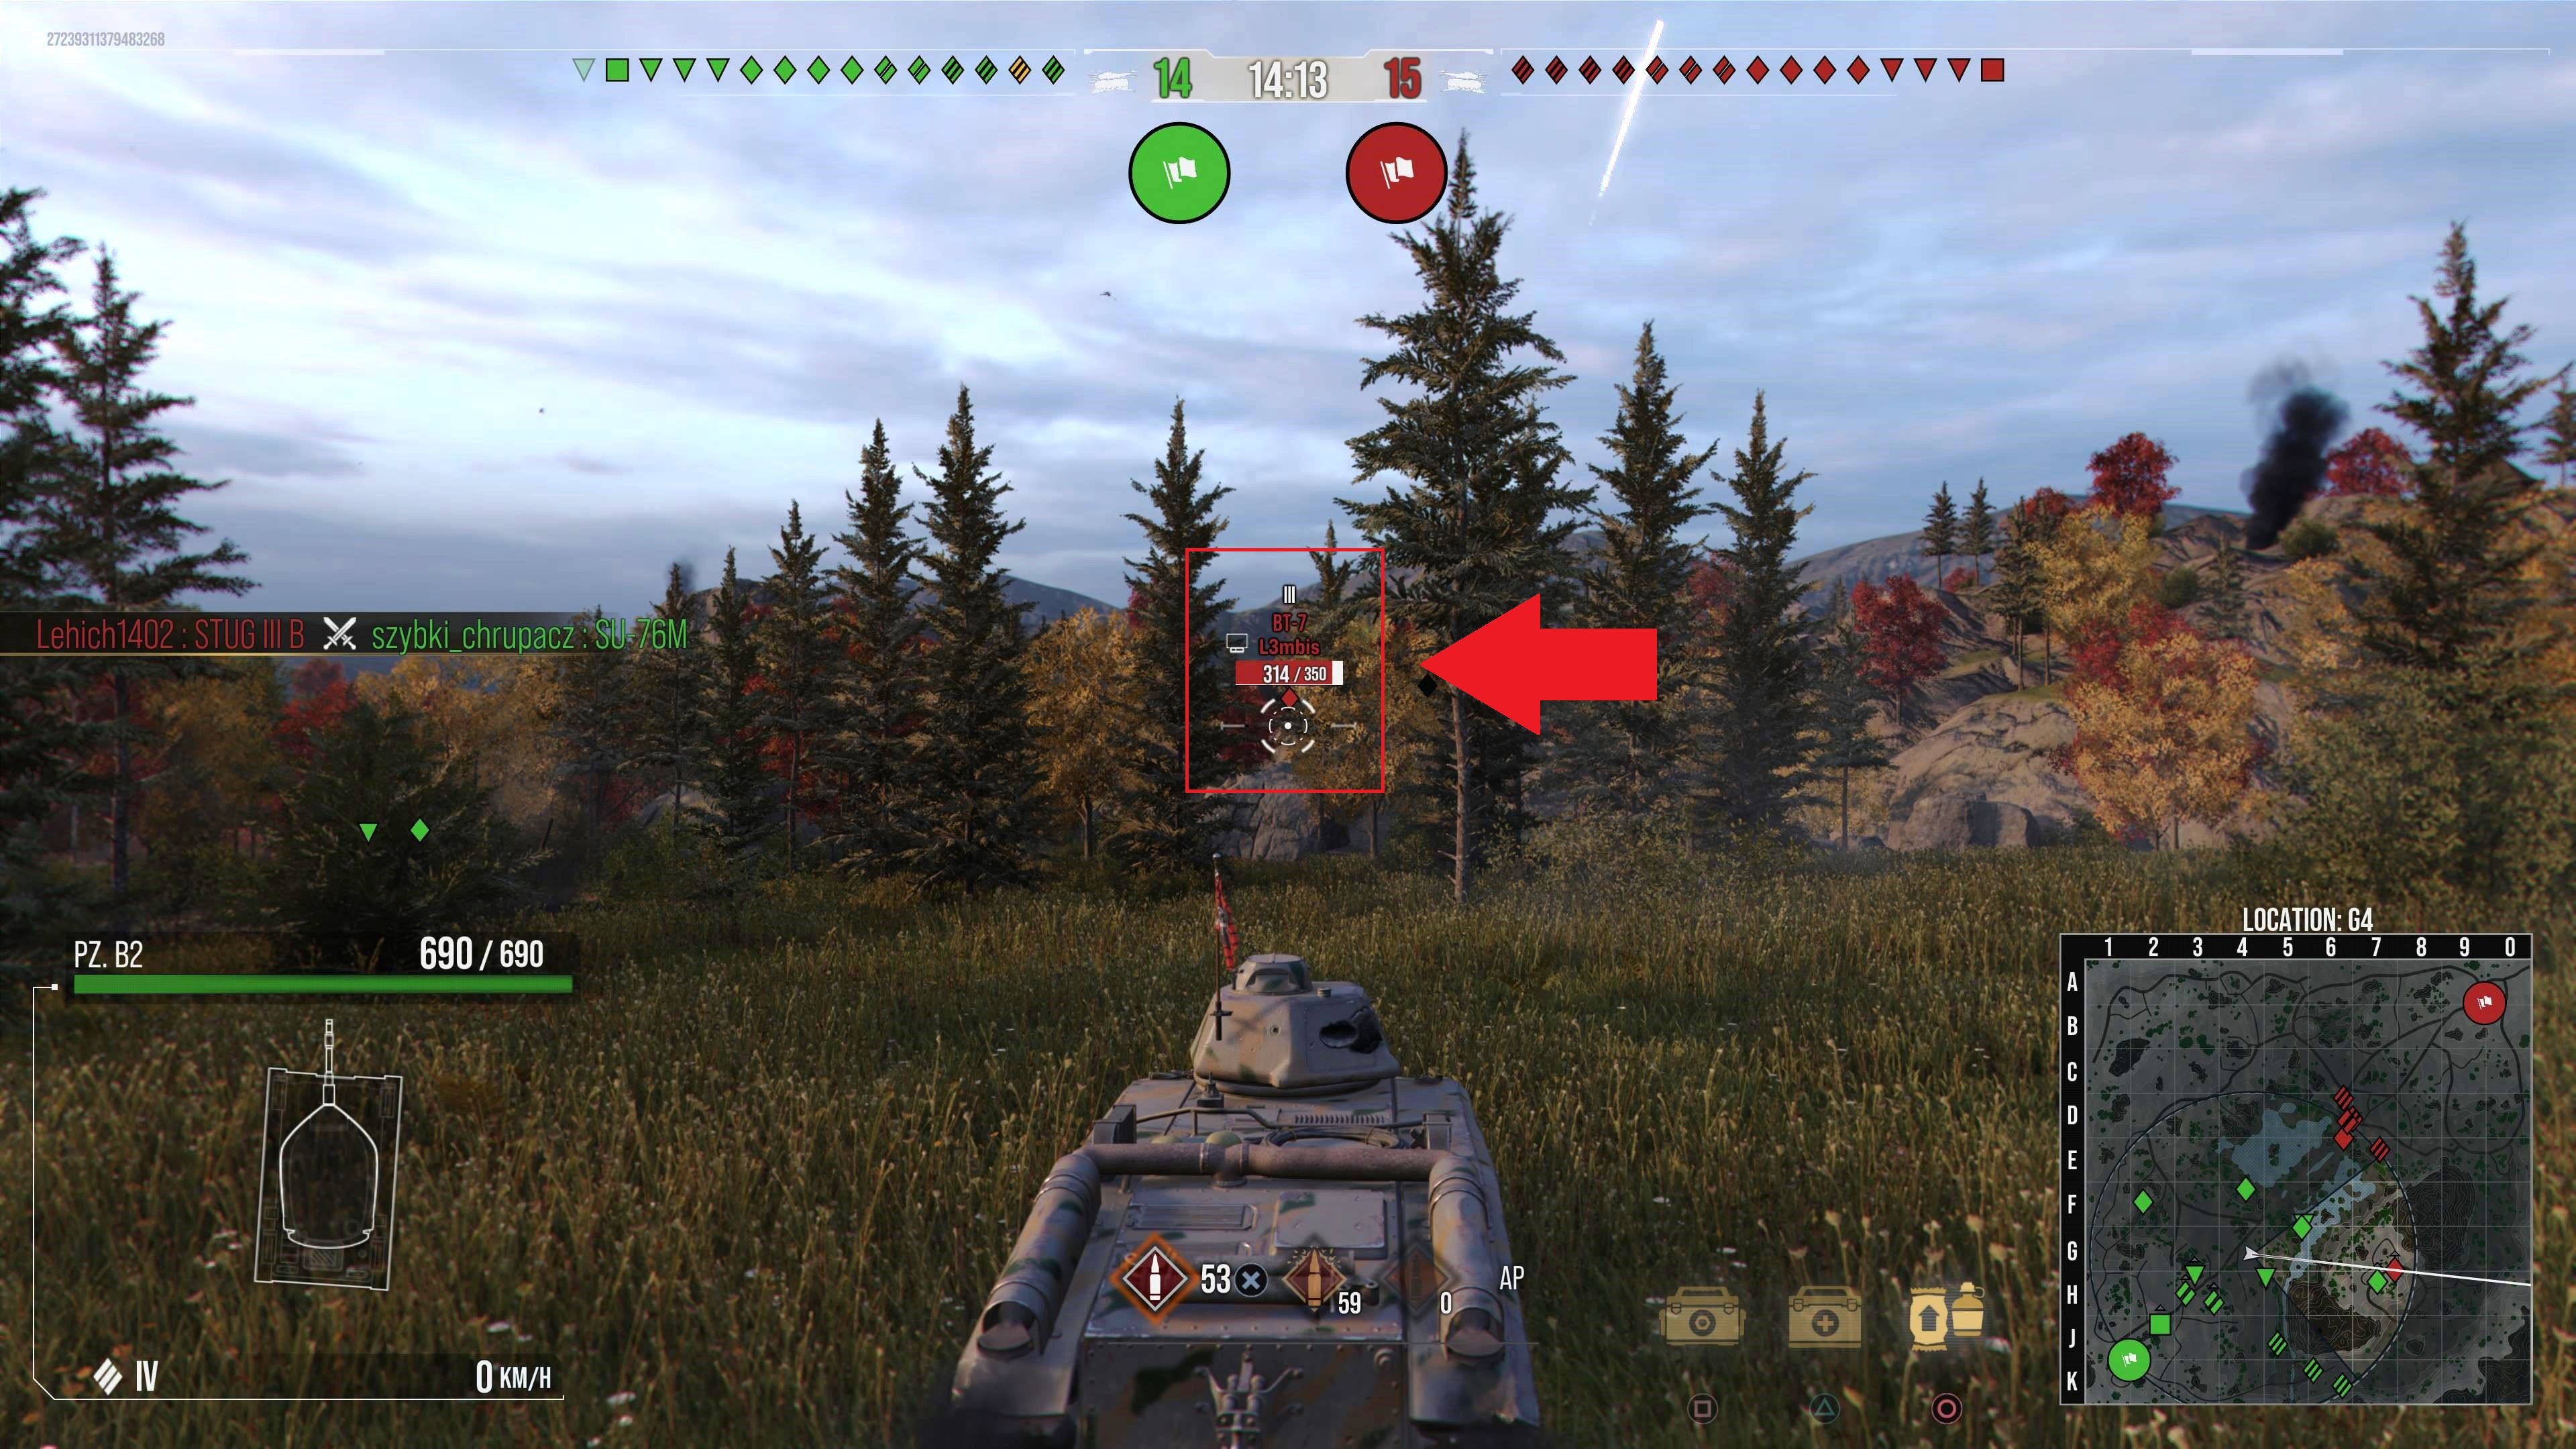
Target Info is exactly what it sounds like: it’s information about the vehicle you currently have your reticle trained on. Above your reticle, you’ll see the following info displayed:
- The player’s name
- The name of the tank being played
- The tank class (and tier in World War II mode)
- The tank’s current health
- The status of the tank’s modules
Player Info
Player Info appears in the lower left-hand corner of the screen. Similar to Target Info, it displays information about your own vehicle:
- The name of the tank you’re playing
- The tank class
- The tank’s current health
- The status of the tank’s modules and crew members
- Your current speed
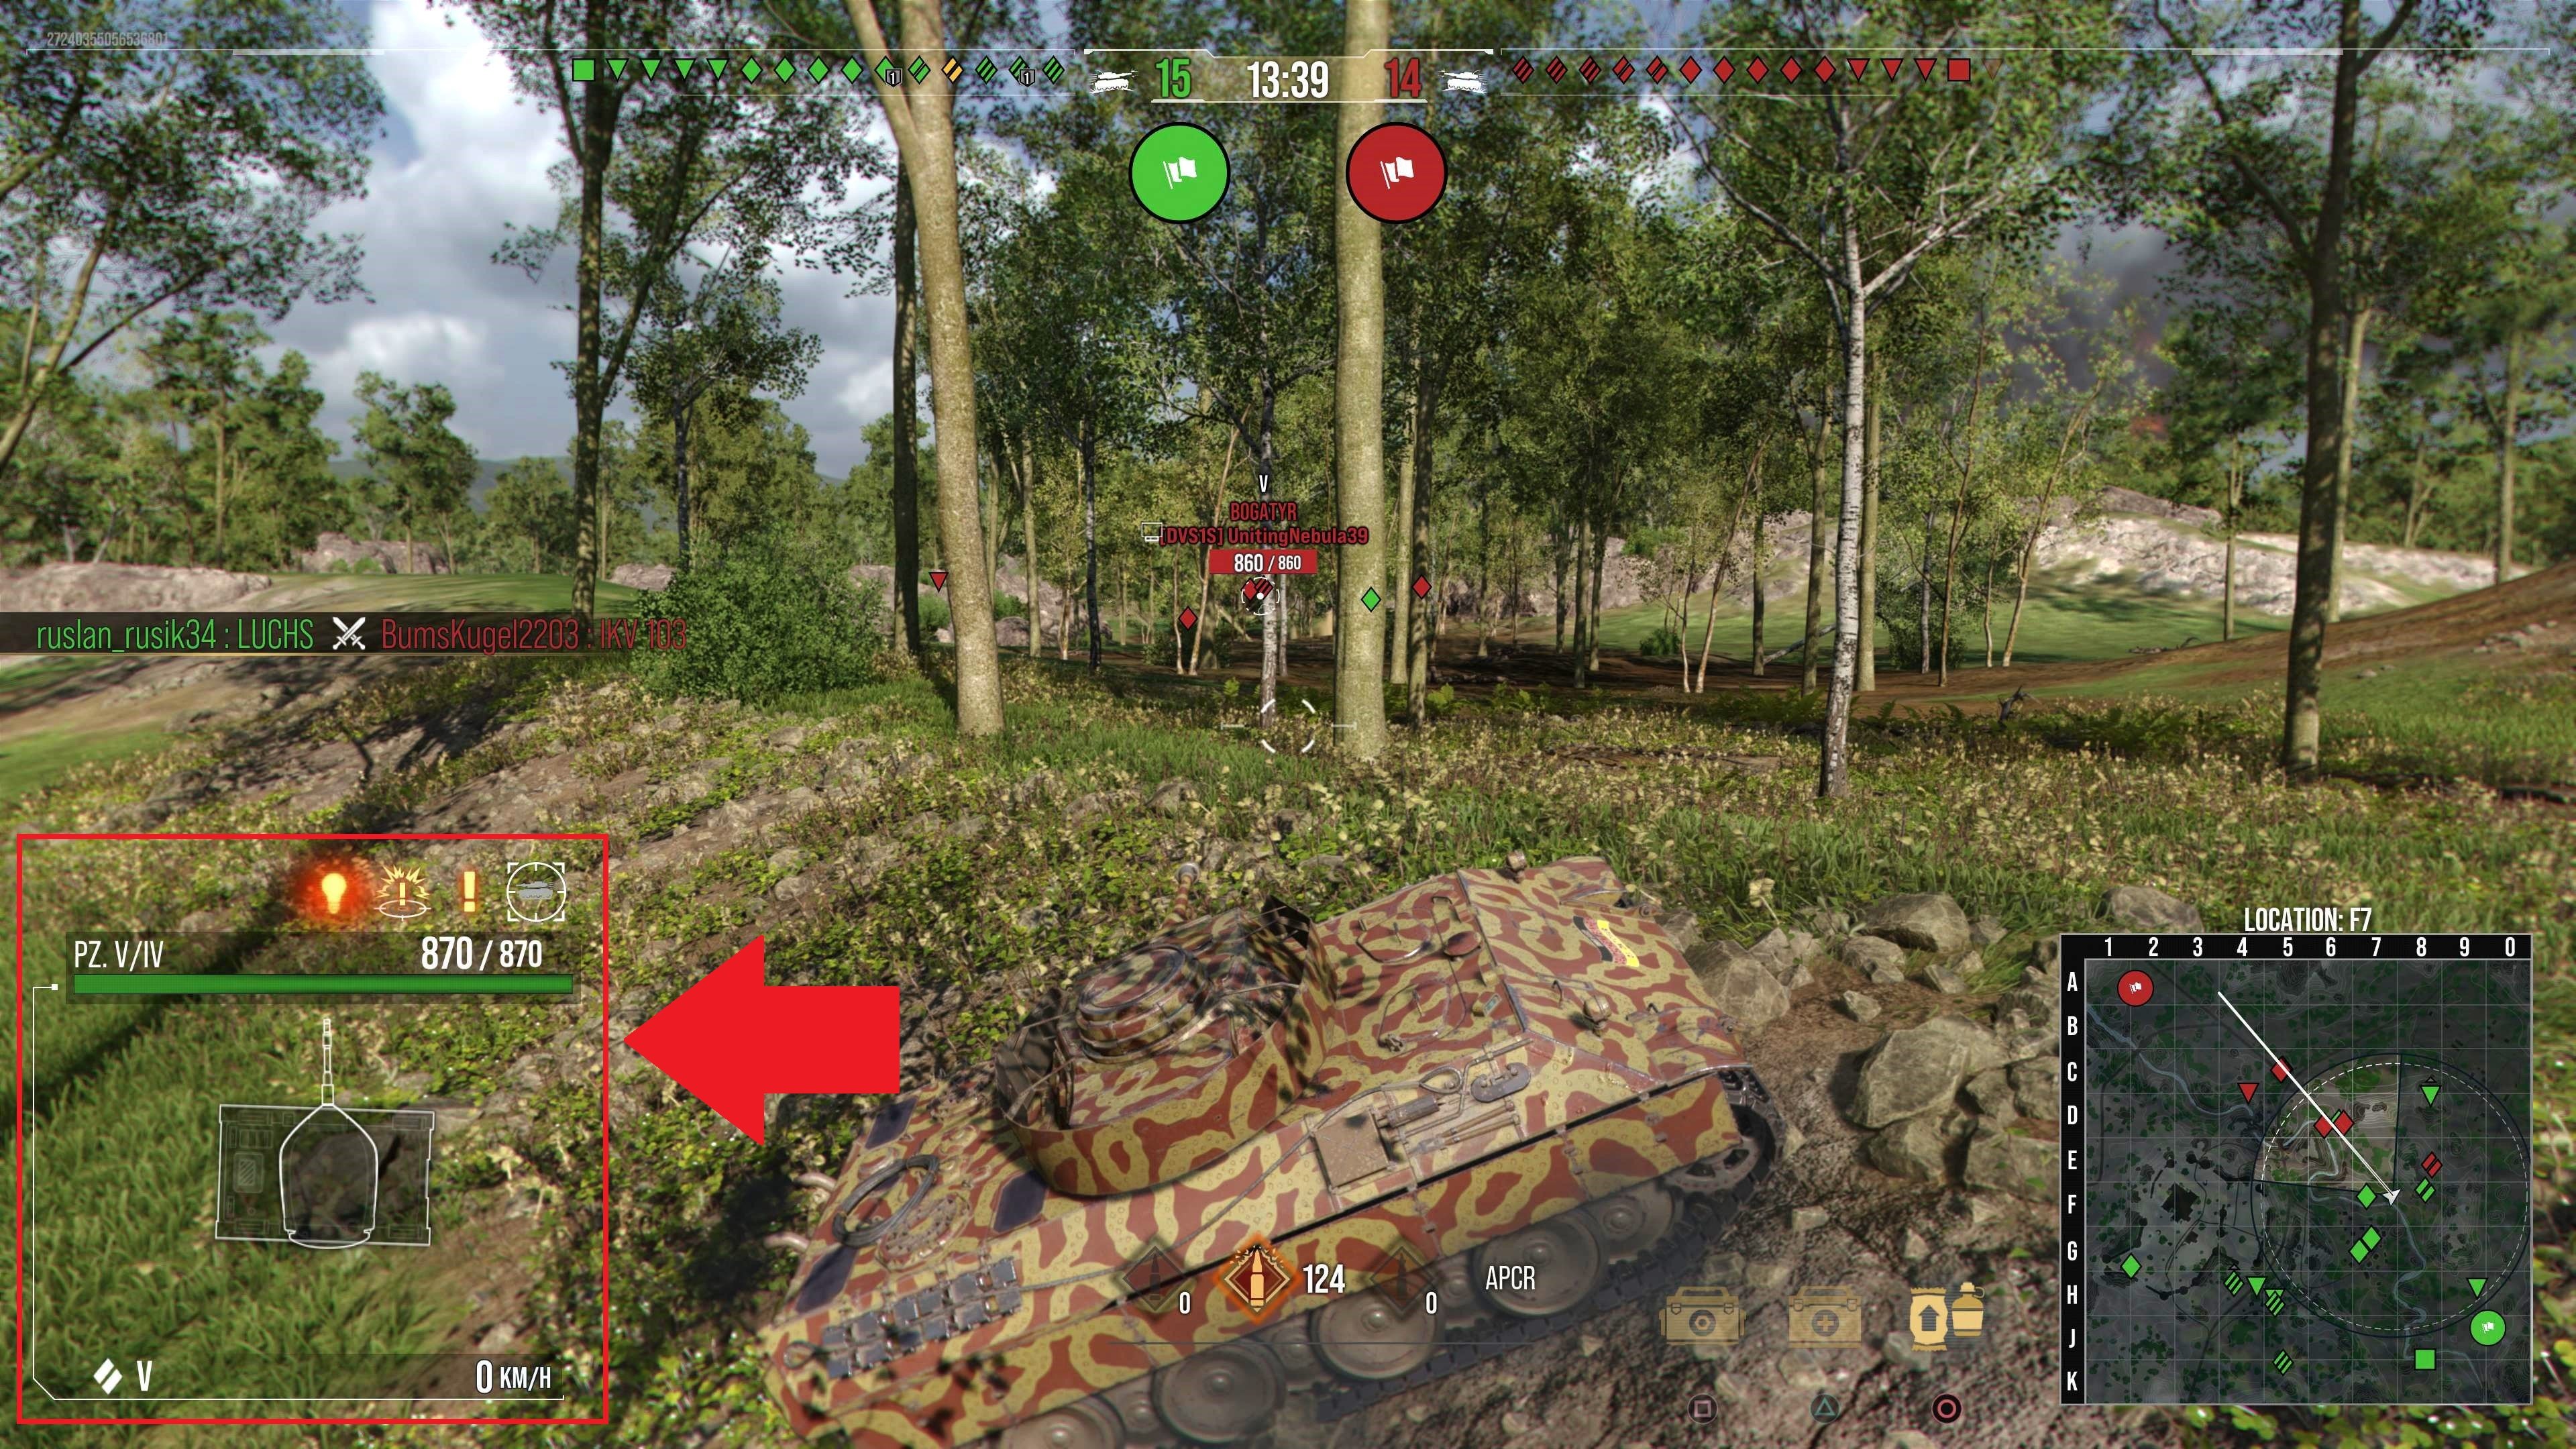
Player Info will also let you know if your reticle is locked on to an enemy vehicle. Once you’re locked on, you’ll see the auto-lock icon above the Player Info element. (When you aren’t locked on to an enemy, the auto-lock icon won’t appear.)
Player Info will also let you know if your vehicle has been targeted by an enemy. Once the enemy has targeted you, you’ll see an exclamation point above the Player Info element.
Along with the “Targeted” indicator, you might also see the “Targeted by Artillery” icon. This indicator lets you know that you’ve been targeted specifically by an enemy artillery vehicle. Watch out from above!
“Targeted by Artillery” has a unique audio alert so that, even if you miss the icon popping up, you will still hear the audio alert associated with it. The alert for Sixth Sense also works with this audio alert in a complementary manner.
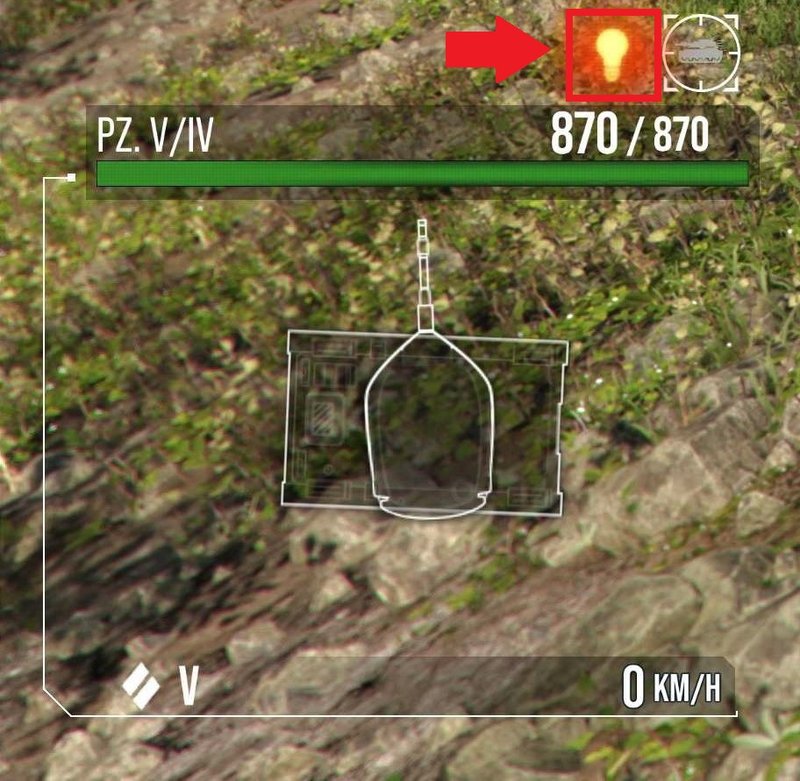
Each game mode uses a different detection or spotting system to help you find your targets. (If your tank’s Commander is equipped with the Sixth Sense skill, you will see a light bulb icon above the Player Info element to indicate when you’re spotted.)
For World War II mode:
- Enemy vehicles remain completely hidden until spotted by you or your allies.
- To spot an enemy vehicle so that their tank becomes visible, your tank’s view range is compared against the enemy tank’s camouflage to determine the distance at which your view range overpowers their concealment and they become spotted.
- Spotted enemies can still be seen only up to a distance of 564 meters away from your vehicle. After that, you will be unable to see an enemy vehicle even if it has been spotted.
- This is an automatic spotting system that is handled by the game.
For Cold War mode:
- Enemy vehicles are always visible at all times.
- You can manually see enemies by using your optics to scan the battlefield without any distance limitations.
- There is still the automatic spotting system as mentioned in the World War II section if they manage to get close enough without you manually seeing them.
- This spotting system is a combination of manually spotting vehicles and an automatic spotting system that is handled by the game.
Color-Coded Damage Values and Callouts
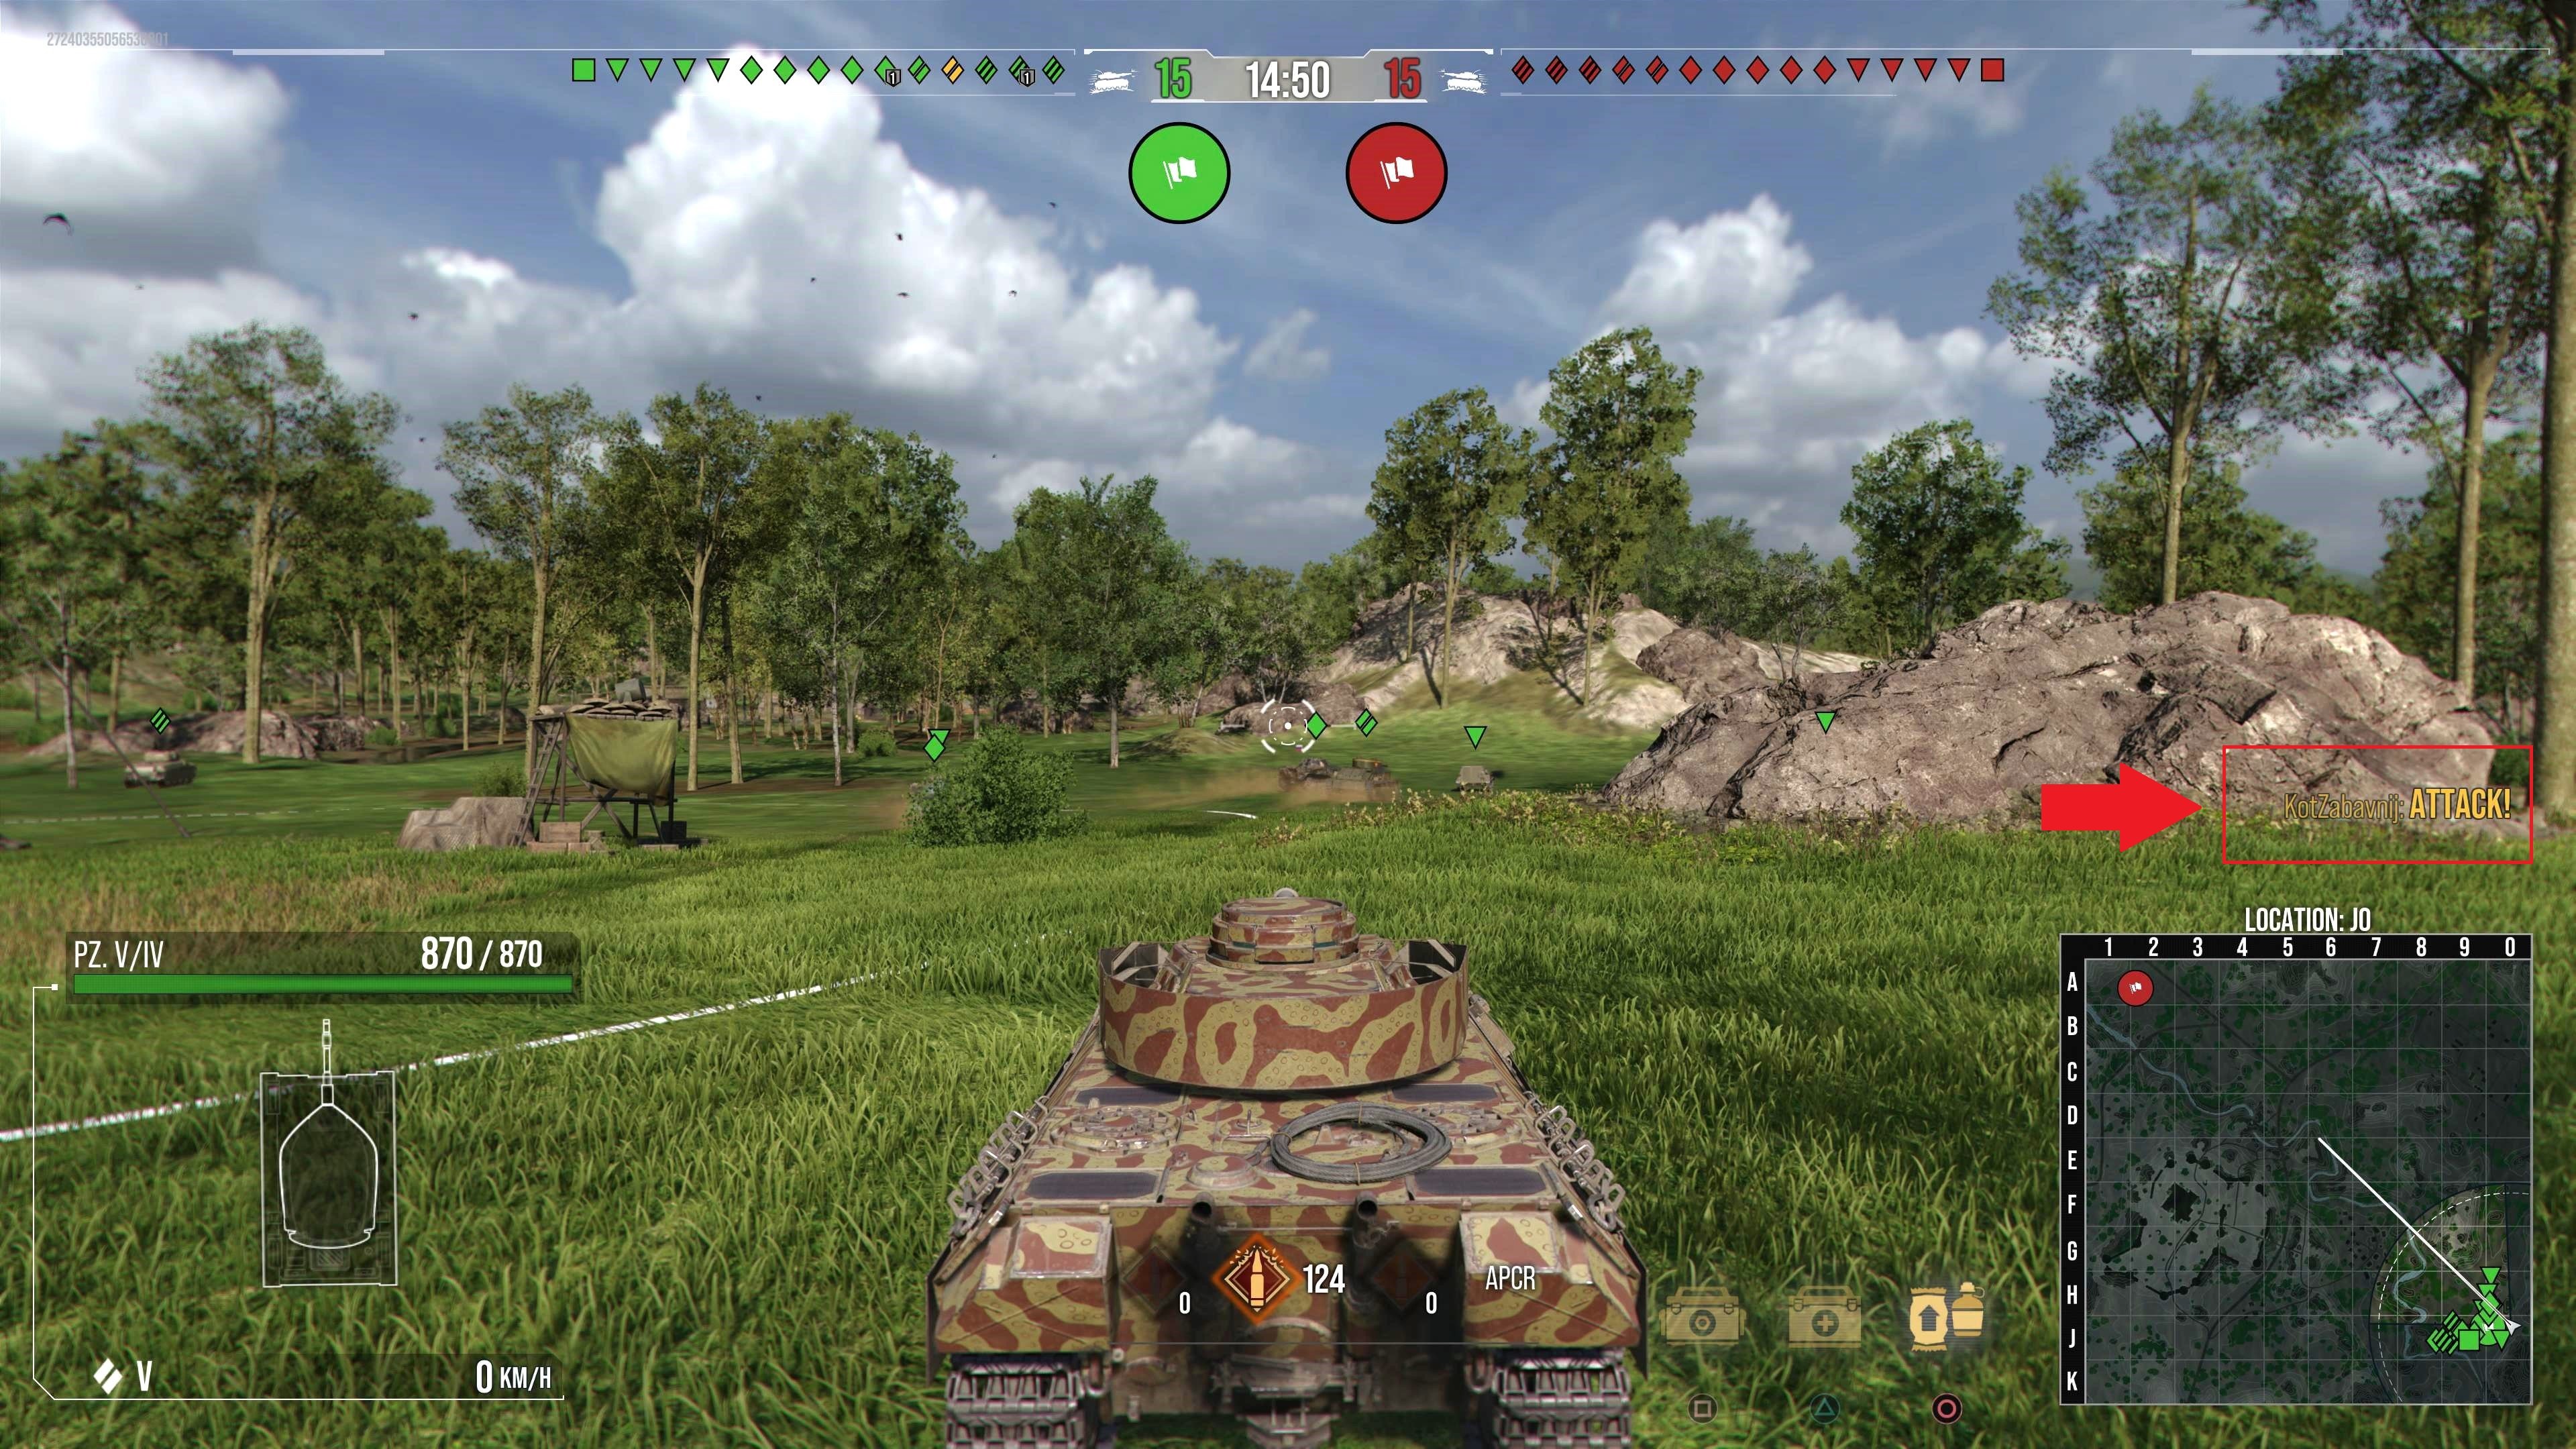
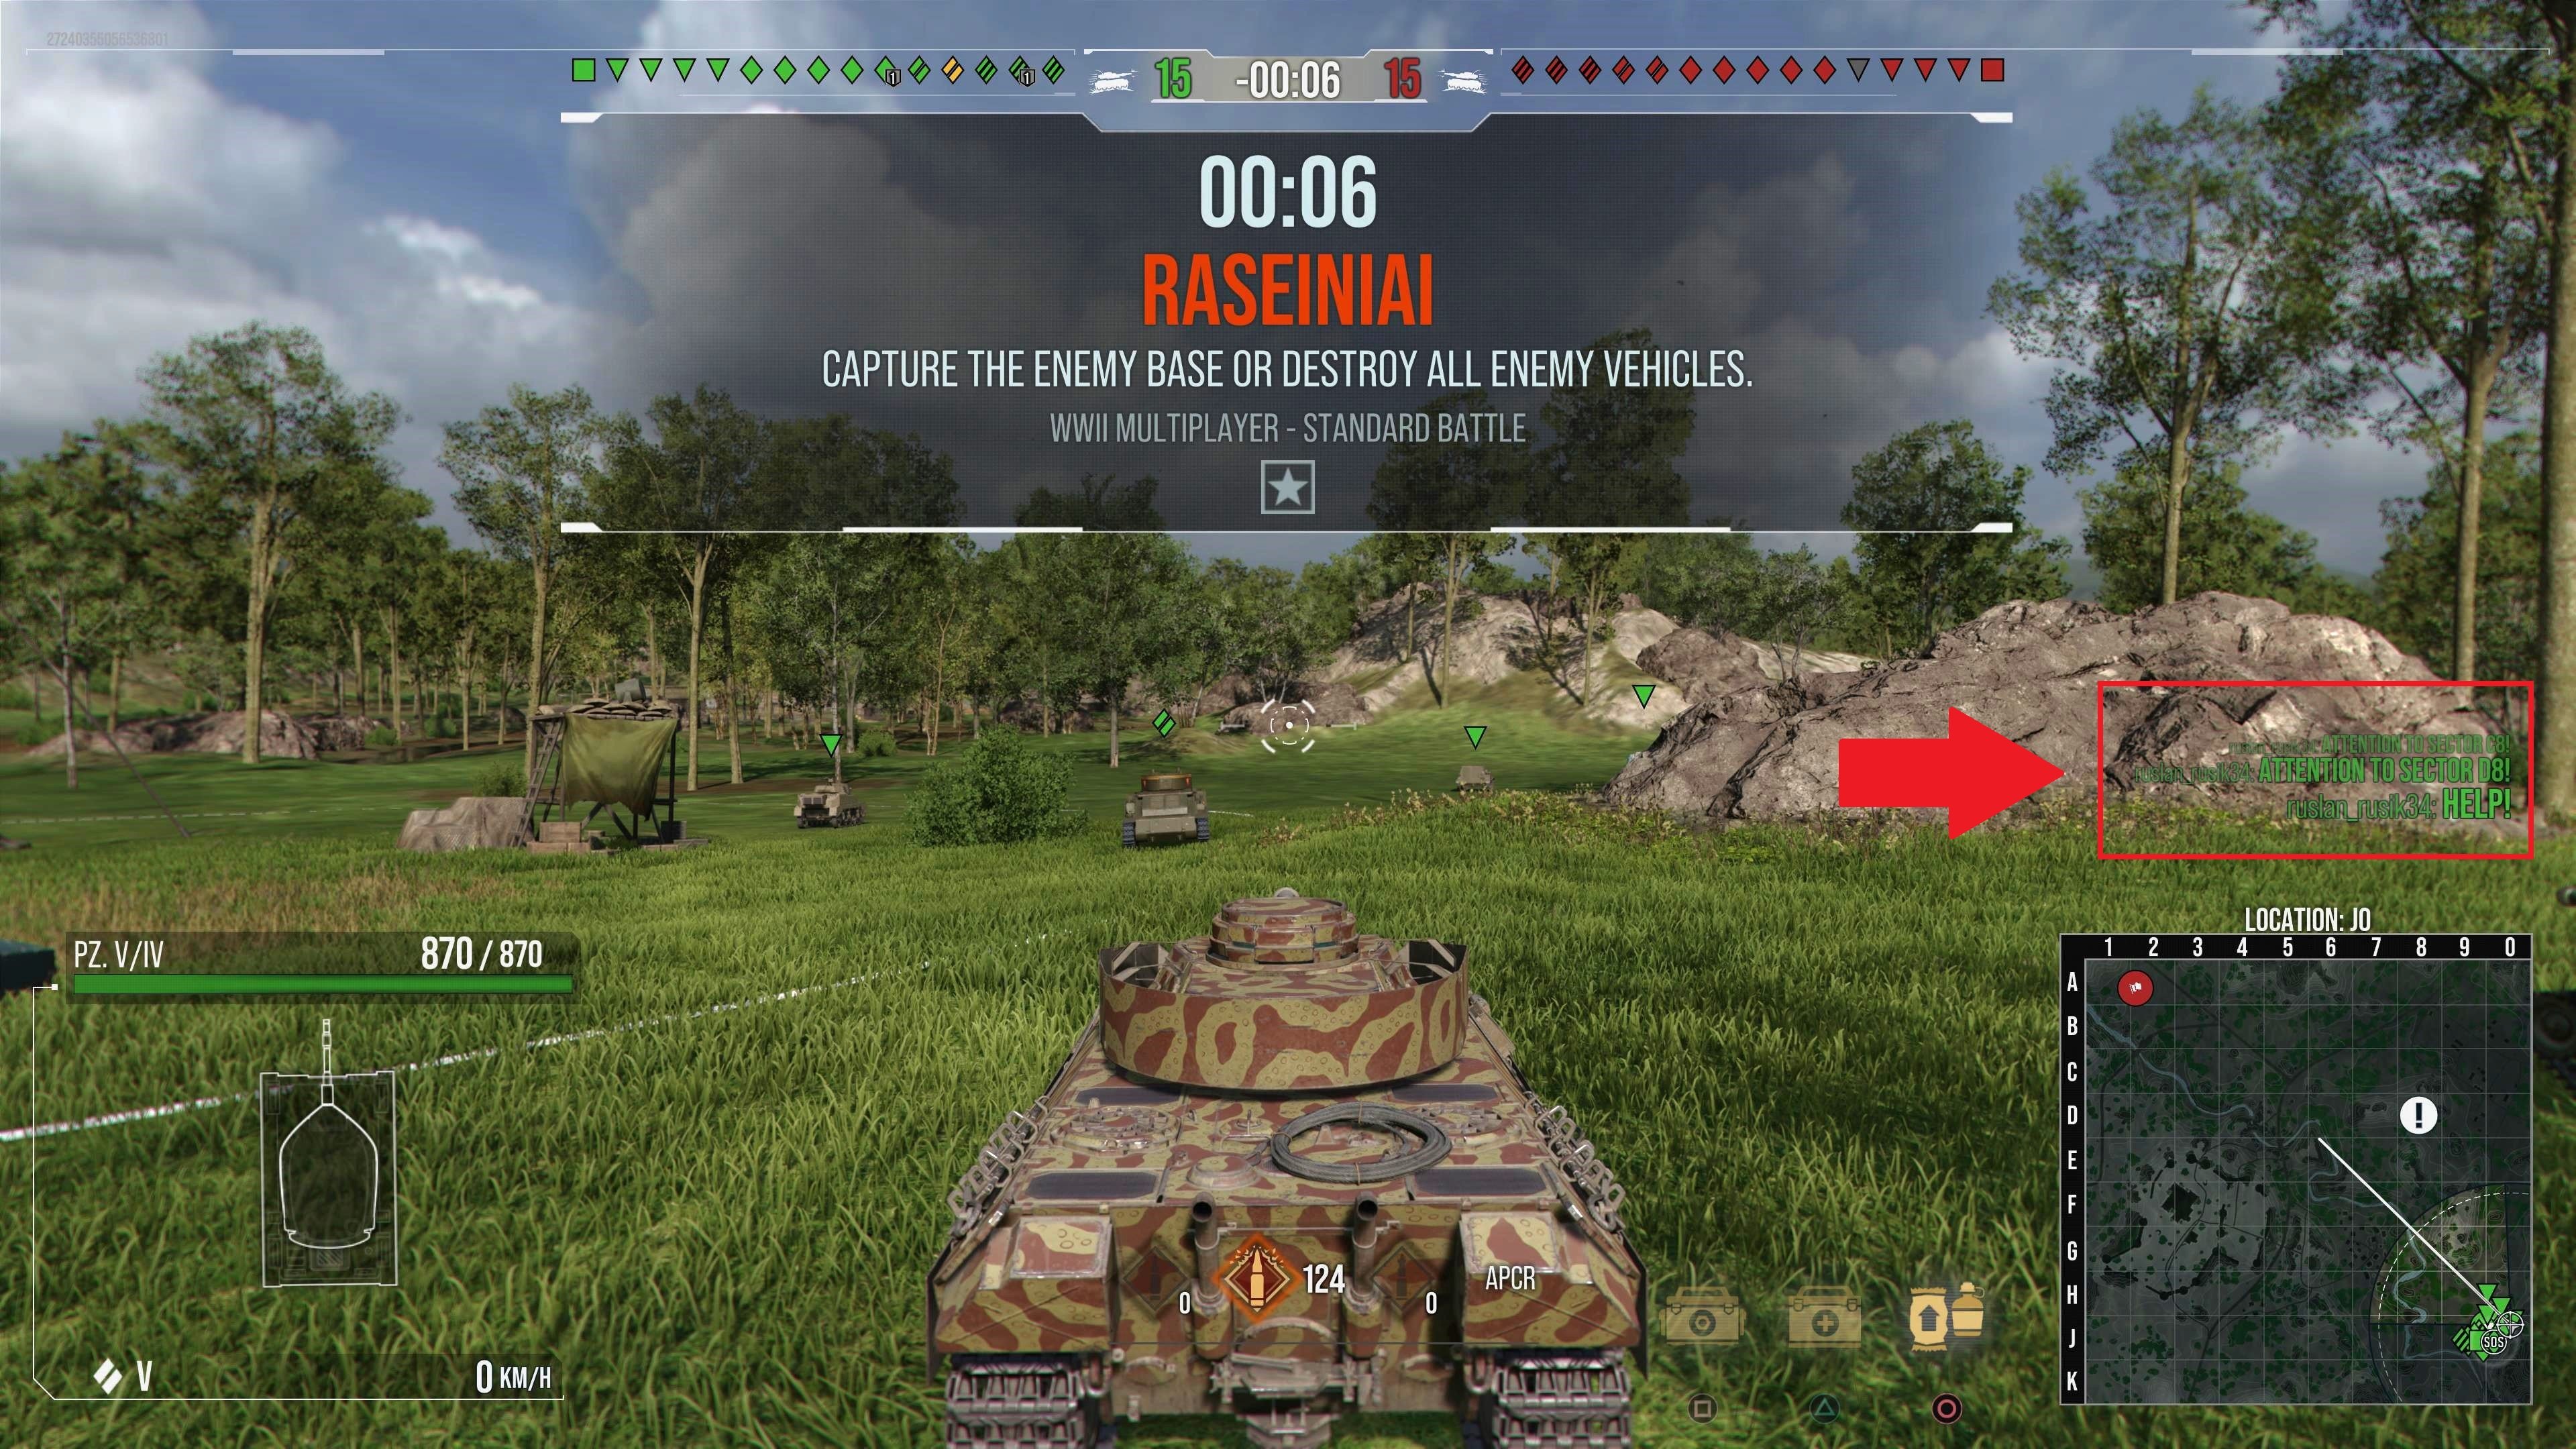
Throughout each battle, text will appear on your screen to keep you updated on what’s happening:
- Tanks destroyed will be announced on the left side
- Communications from your teammates and platoonmates will appear on the right side
- Damage numbers will appear near the tank damaged
To make this info easier to parse in the heat of the moment, we’ve color-coded this text as follows:
- Yellow: All actions related to you and your platoonmates
- Damage your shot caused
- Callouts in the communications feed
- Name and tank in the destruction feed
- Green (or the color assigned to your team): All actions related to your team
- Allied health lost
- Callout in the communications feed
- Name and tank in the destruction feed
- Red (or the color assigned to the enemy team): All actions related to the enemy team
- Enemy health lost
- Callout in the communications feed
- Name and tank in the destruction feed
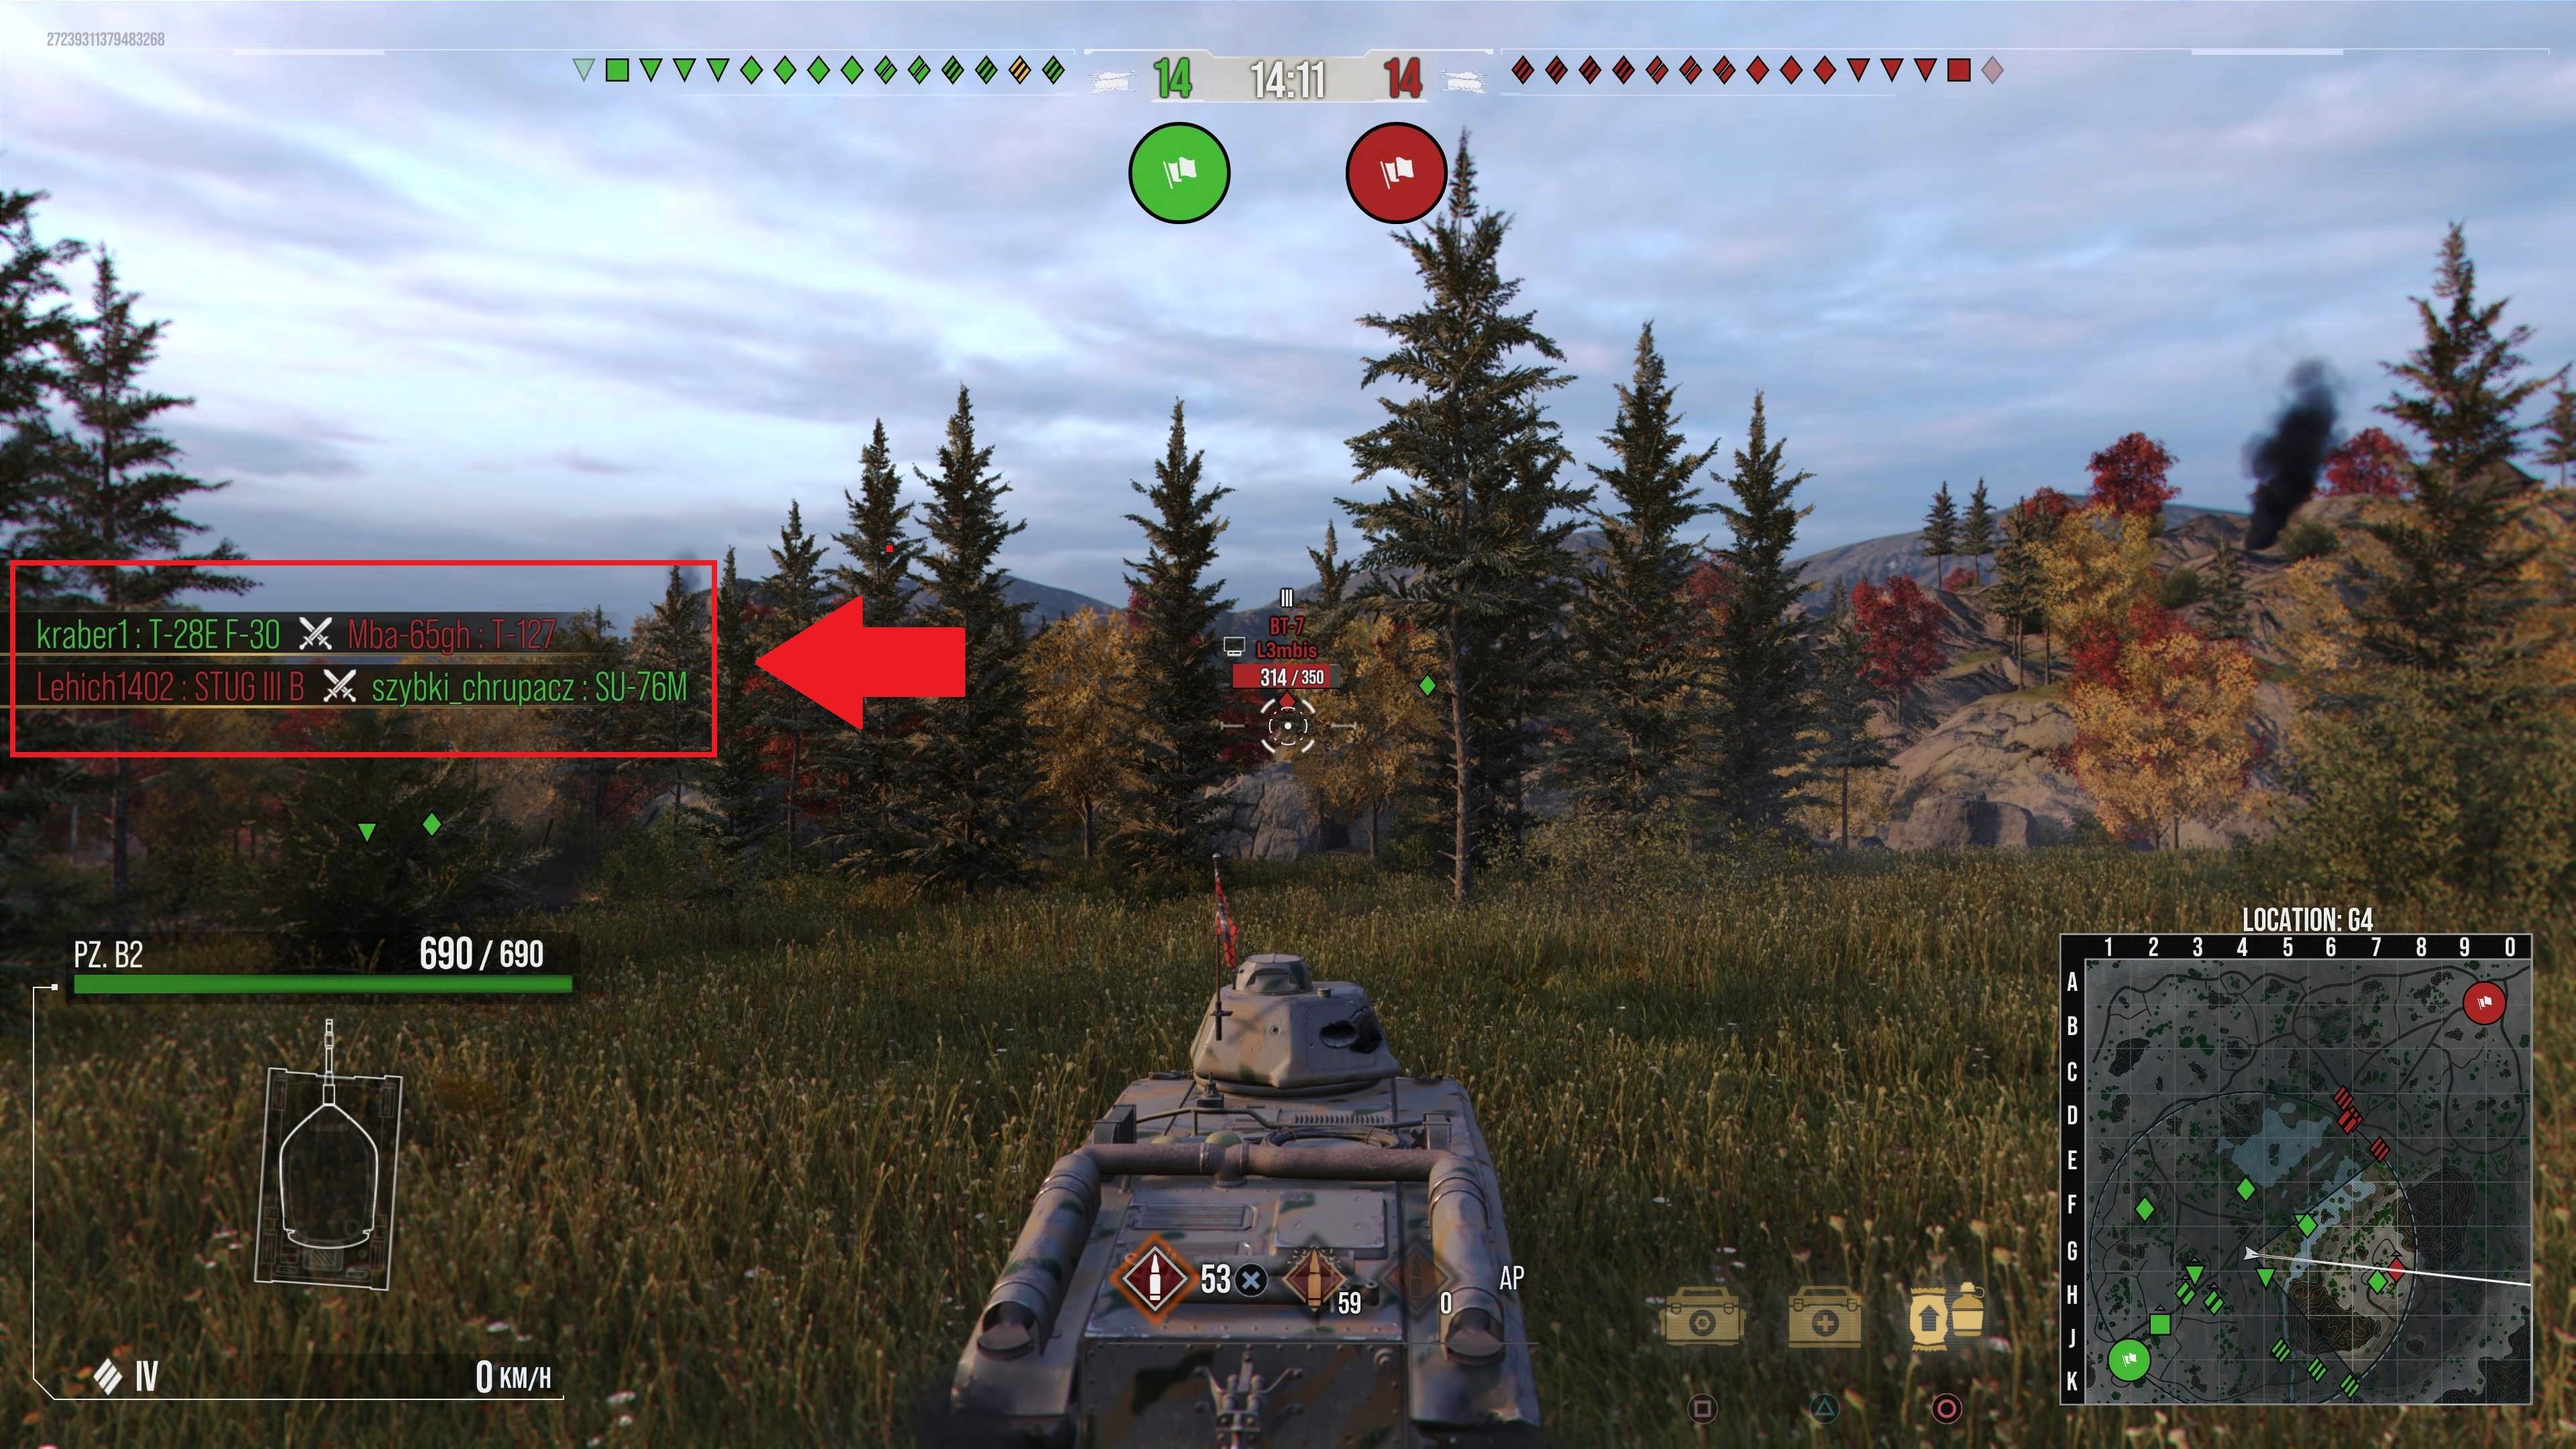
HP Bars and Bounce Indicator
While in battle, you’ll be able to see hit point bars, or HP bars, above other tanks on the field. HP bars will be visible above ally tanks on your screen as well as enemy tanks that have been detected. They show how many hit points the tank has left before it’s destroyed.
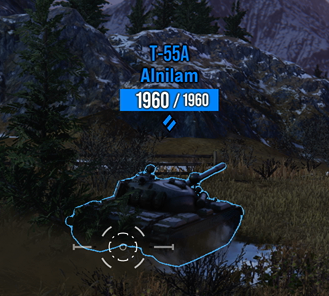
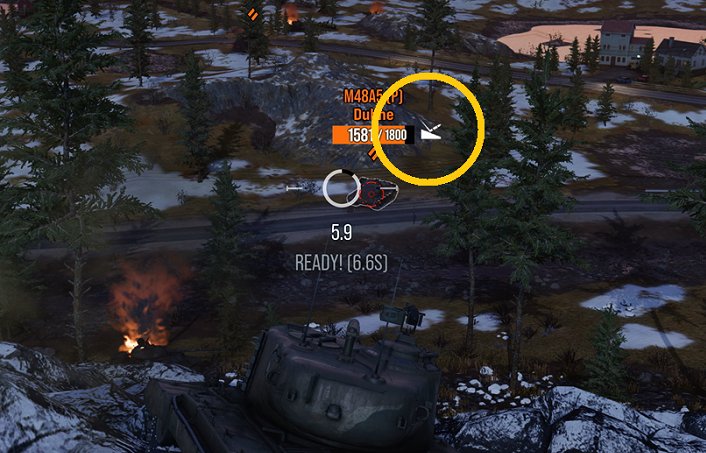
Additionally, after you fire at an enemy tank, you might see a bounce indicator icon appear next to the tank’s HP bar:
The bounce indicator lets you know that your shot either bounced when it struck the tank’s armor or was blocked by spaced armor. Adjust your position and fire again!
Ammo Indicator
The Ammo Indicator sits at the bottom center of the screen. It shows:
- The type of ammo you currently have loaded
- The number of the current type shells you have remaining
- The other types of shells equipped on your tank
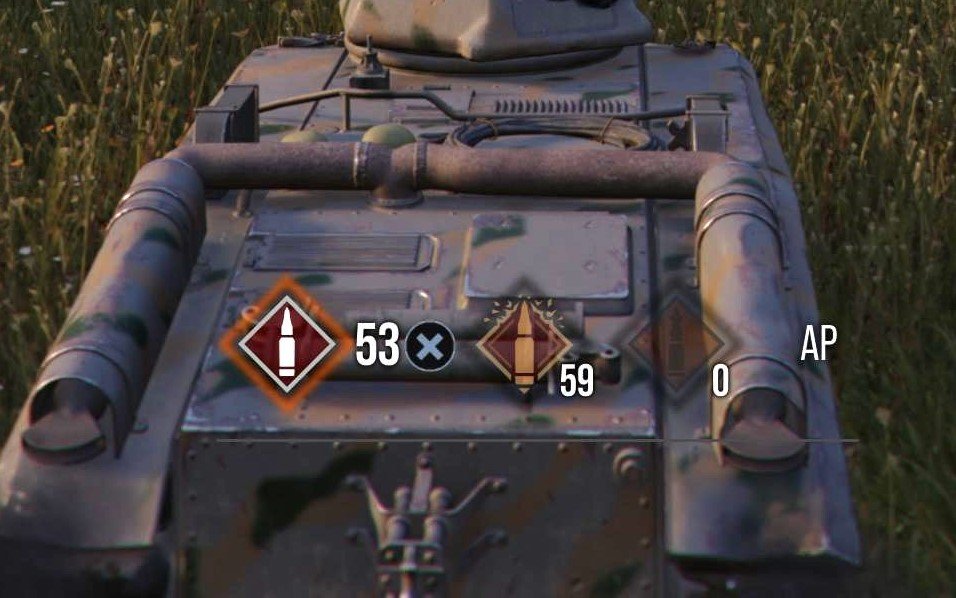
While reloading your ammo, a fill animation that shows your reload status will appear.
If you have multiple types of ammo equipped on your tank, you can switch among them by pressing the corresponding button shown above each type.
If you have multiple weapons or turrets, you can switch among them by pressing and holding the corresponding button displayed.
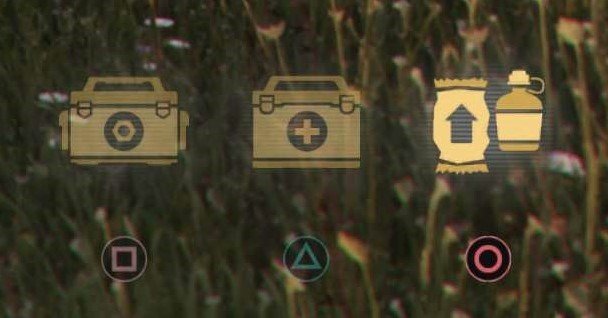
Consumables Component
The Consumables Component is located to the right of the Ammo Indicator at the bottom of the screen. It displays all the Consumables currently equipped on your tank and the button to press to use each one.
If you have a reusable Premium Consumable equipped, you’ll see a cooldown timer on its icon after using it, showing you how much time is left until you can use it again. The icon will brighten as soon as it’s available for use.
Map
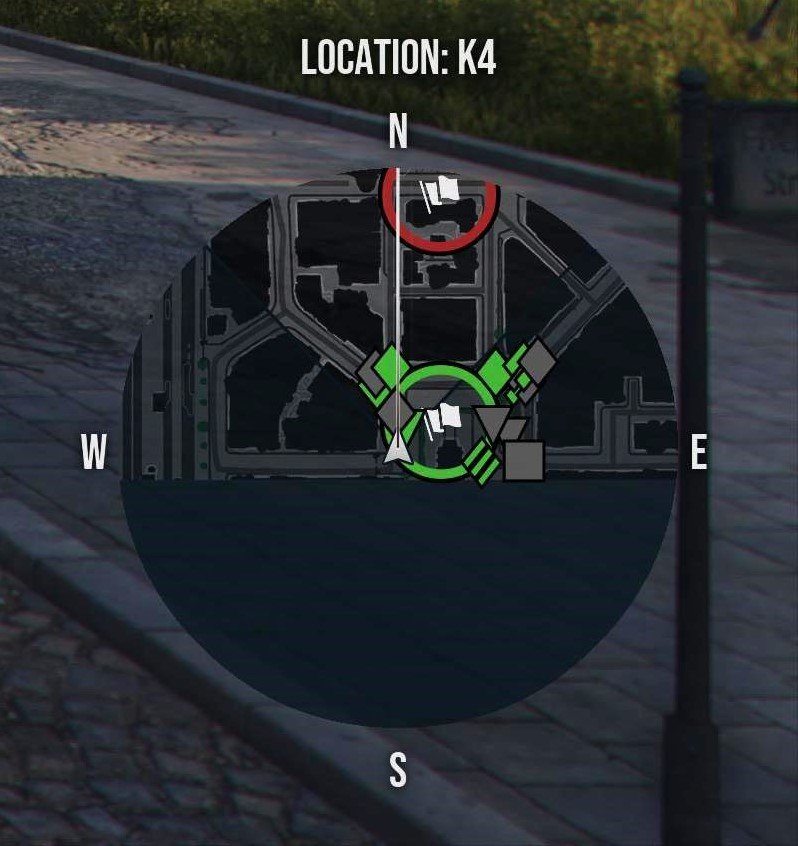
In the upper left corner of your HUD is a small map that will stay open and keep you oriented throughout the fight.
There are two mini-maps available for you to use: the round map or the square map.
The round map is a circular map that’s limited to your immediate surroundings and that rotates along with your camera orientation. It’s great for situational awareness and focus on immediate threats.
The square map is exactly what it sounds like: a square, reduced-size version of the battlefield’s full-screen map. It’s more detailed than the round map and provides the following information about your tank, taking into account any Equipment, Consumables, Camo, Ammo, and Commander Skills you have equipped:
- Gun Direction: follows the tank’s gun, showing its current direction and range of the ammunition loaded
- View Range: represented by a cone; shows the player’s view angle and range and is controlled by the camera
- Detectability Range: based on the tank’s visibility; enemies within this circle have a possibility of spotting your vehicle
- 50-Meter Auto-Detect Circle: enemies within this detection circle will automatically be detected
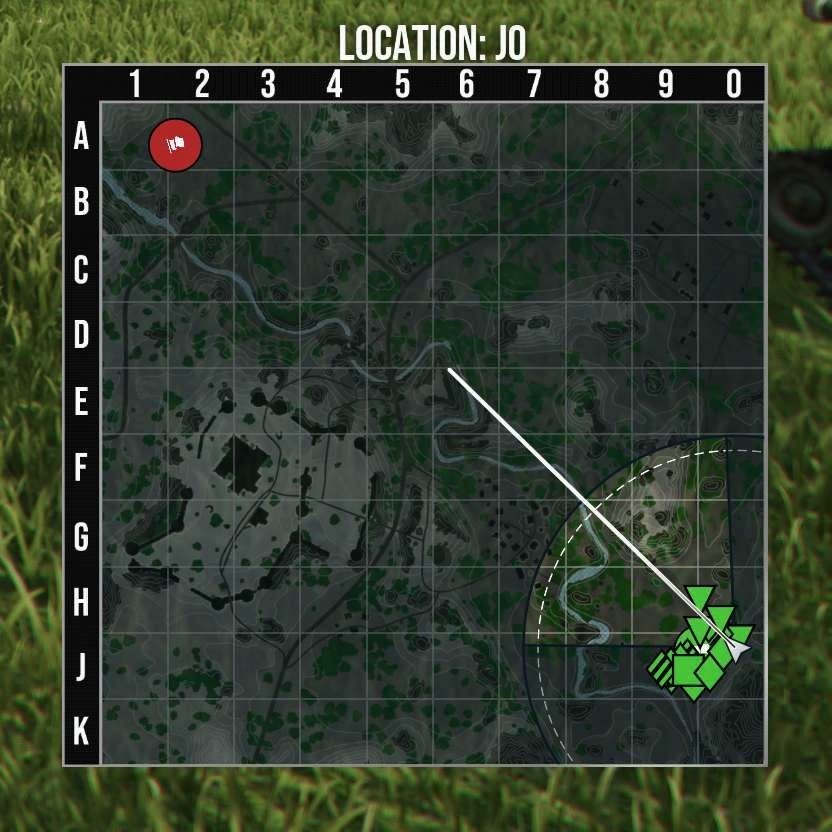
By default, your HUD will show the square map. You can change the default mini-map within the game options or switch between them during a match by holding down either the Select button (Xbox) or the touchscreen button (PlayStation).
Within the game options, you can also change the location of the mini-map from the upper-left corner to the lower-right corner.
Ribbons
Ribbons are displayed in the upper right area of your HUD. Ribbons are awarded for any action that earns XP and will track how many of each Ribbon type you earn during the battle.
|
Enemy Damaged  |
Damage an enemy tank |
|
Critical Hit  |
Damage a component or crew member of an enemy tank |
|
Tank Destroyed  |
Destroy an enemy tank |
|
Enemy Spotted  |
Spot an undiscovered enemy tank for your team |
|
Base Captured  |
Capture the base |
|
Tracked Target Hit  |
An ally damages a tank you’ve tracked |
|
Spotted Target Hit  |
An ally damages a tank you’ve spotted that they otherwise wouldn’t be able to see |
